CPR and First Aid Training Kits in Canada: What Every Community Group Needs
Community groups carry a quiet responsibility. You are often the first organized presence at festivals, youth sports, faith gatherings, cultural events, farmers markets, and seasonal celebrations. When someone collapses or a child chokes, help needs to start within seconds, not minutes. Ambulances cover vast geographies in Canada, especially outside major cities, and even in urban areas response time can stretch during peak demand. Well‑chosen CPR and first aid training kits turn volunteers and staff into confident first responders who can bridge that critical gap.
This is a practical guide from the field. It reflects what keeps community programs running, what fails under pressure, and how to plan for conditions that are distinctively Canadian: winter storage, bilingual labelling, remote connectivity, and stretched budgets. It also considers where to source CPR training manikins in Canada, how to evaluate AED training equipment Canada wide, and what to look for in CPR instructor packages Canada suppliers offer.
Why a kit is not just a box of gear
A good kit shapes how people learn, practice, and perform. The contents influence whether a first‑time trainee remembers to push hard and fast at 100 to 120 compressions per minute, whether a team defaults to safe glove practices, and whether an instructor can run a class for twenty people without losing momentum to equipment failures. More than once, I have watched a session stall because the only adult manikin available had a torn airway valve. Adults walked away less confident, simply because the props failed them.
Beyond that, a community group’s kit becomes infrastructure. It lives at the community centre, rides in the trailer to events, survives a January cold snap, then pulls double duty for monthly drills. That means durability, spare parts, and a maintenance plan matter as much as the initial purchase.
What a complete community training kit typically includes
Every group’s context is different, but a reliable baseline exists. When you open the case, you should be able to run a two‑hour CPR and first aid session for 8 to 12 participants with minimal improvisation. For many groups, that looks like the following.
- Two to four adult CPR manikins with feedback, one child and one infant manikin, a set of lungs/airways and face shields per learner, and disinfectant supplies
- An AED training unit with at least two sets of reusable trainer pads and a remote, plus a quick‑reference card
- A first aid training pack: bandage demos, triangular slings, roller gauze, elastic wraps, splint material, burn dressing demo, and practice tourniquet
- PPE for participants: a box of assorted nitrile gloves, eye protection for instructors, pocket masks or keychain barriers
- Instructor support: laminated scenarios, stopwatch or metronome app, projector cables or a compact screen if you work in rotating venues
This first list stays tight on purpose. Most kits grow over time, and that is fine. But if you can run a realistic session from this baseline, you will meet the needs of most community events and beginner classes.
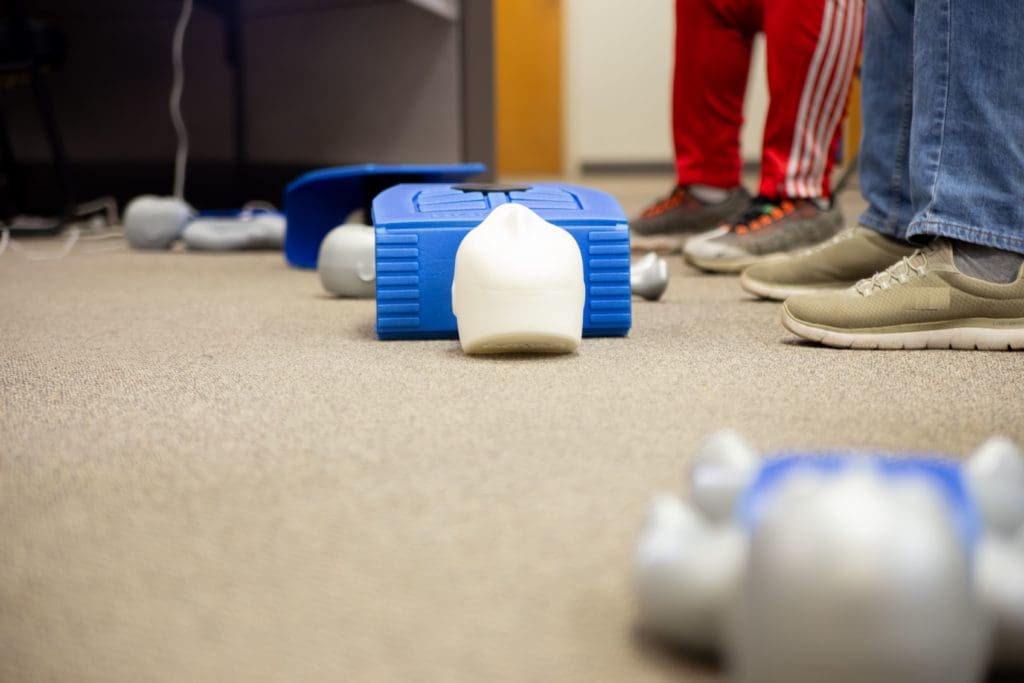
Choosing CPR training manikins in Canada that hold up
Manikins drive learning. They also absorb sweat, skin oils, and the occasional rough handling when a trainee gets enthusiastic. In Canada, availability and after‑sales support matter, because you need replacement lungs, face skins, and valves quickly between sessions.
Start by considering feedback. Basic models teach hand position and depth by feel. Newer models offer light or app‑based feedback on depth, recoil, and rate. When groups add feedback manikins, pass rates improve, and learners remember what good compressions feel like. For community use, a mixed fleet works well: two feedback units for showcasing correct technique, plus one or two rugged basic manikins for high‑volume practice. If your budget cannot stretch to app‑enabled options, look for click or light indicators that confirm depth.
Durability pays for itself. Manikins with wipeable torsos and replaceable faces simplify infection control. Choose a brand with Canadian distribution so you can source lungs and valves without international shipping delays. Verify that the lungs come in packs sized for your throughput. A ten‑person course with two breaths per cycle consumes more airways than you think, especially if you are running back‑to‑back sessions.
Infant and child models are not optional. Many emergencies in community spaces involve children. Infant airway resistance and chest compliance feel different. Adult‑only training leaves volunteers underprepared for choking relief in babies or pediatric CPR. At minimum, keep one infant and one child manikin. If your programs focus on early years education or swim lessons, two infants will prevent lineups and rushed practice.
Cold is a real factor. If your kit travels in a vehicle in subzero weather, manikin torsos stiffen. Plastic components can crack if flexed while frozen. Bring gear indoors early and let it warm gradually before class. In the field, I have watched valves split when assembled cold. A small thermometer in the kit and a simple rule - do not assemble below 10°C - avoids that cost.
AED training equipment Canada wide: what works for learners
Real AEDs save lives, but for training you need units that mimic voice prompts, pad placement, and shock cycles without delivering energy. Good AED trainers let you select scenarios: shock advised, no shock advised, low battery, or pads not making contact. The remote allows the instructor to adjust the scene without walking around the room.
Choose AED training equipment that matches the brand style your venues already own, if you know it. Airports, arenas, and community centres commonly install popular public‑access AEDs, and familiarity builds confidence. If you teach in multiple sites with mixed devices, pick a trainer that imitates the most common voice prompt patterns and pad layouts. Universal trainers with bilingual prompts help in Canadian settings where English and French mix within one cohort.
Pad quality is not cosmetic. Reusable trainer pads need to stick through several classes without leaving residue. Cheap pads curl at the corners and frustrate learners. Budget for one extra set of pads per device and store pads on the plastic backing they came with to preserve adhesive. Also check that the cable length matches a real unit’s reach from the right hip position to the left chest pad. A short cable trains bad habits.
One note on batteries: training AEDs may use proprietary rechargeable packs. If you operate in remote areas where shipping lithium batteries faces delays, choose trainers that accept standard AA or AAA cells. Keep a written record of battery changes with dates and expected runtime. Nothing unravels a scenario faster than a trainer that dies after the first group.
The first aid side of the equation
CPR without first aid leaves gaps. Choking, severe bleeding, suspected fractures, sprains, and minor burns are common at community events. For training realism, your kit should include splints that can be shaped, elastic wraps that actually compress, a practice tourniquet that locks under tension, and triangular bandages large enough to https://cpr-depot.ca/ create an effective sling. When possible, choose reusable demonstration versions for practice and keep sealed, sterile items for your live event response kit.
Learners respond to tactile practice. A rolled towel becomes a passable ankle support in a pinch, but real rigidity teaches the difference between a loose wrap and a supported joint. In my experience, one instructor can supervise three stations without losing control: bleeding control, sling and swathe, and splinting. Rotate groups through in short bursts to maintain energy and retention.
Sourcing CPR instructor packages Canada suppliers provide
Instructor packages bundle curriculum support, manikins, AED trainers, and accessories. They are attractive for groups starting from scratch. When comparing offers, look beyond the headline price. Ask whether they include replacement consumables for the first year, access to bilingual teaching materials, and shipping within Canada at predictable cost. Rural groups should verify whether shipping surcharges apply to their postal codes.
Some packages tie you to a certification body’s materials. That can be beneficial if you plan to issue nationally recognized certificates through the Canadian Red Cross, Heart and Stroke, or St. John Ambulance. If you primarily run awareness sessions without formal certification, look for more flexible content and equipment mixes. Clarify what happens if a manikin fails under warranty and how fast a loaner can arrive. Community programs cannot afford a six‑week turnaround.
Emergency training equipment Canada realities: environments and edge cases
Canadian communities teach in church basements, hockey rinks, school gyms, and field tents. Each space adds constraints that your kit needs to handle.
In rinks, the ambient temperature drops, floors are hard, and acoustics echo. Foam kneeling pads reduce knee strain during practice and help keep trainees’ attention. A compact PA or a small speaker for your device improves voice prompt audibility from AED trainers.
At outdoor festivals, wind carries voice prompts away and dust invades gear. Store small items in zipper pouches, and keep disinfectant wipes sealed in a rigid case. Sunlight washes out LEDs on feedback manikins, so position stations under shade when you demonstrate.
In Indigenous and remote communities, shipping, maintenance, and trust matter. Build time for train‑the‑trainer models so local leaders can run refreshers without waiting for an outside instructor. Choose gear that does not require a constant app connection, since connectivity drops in many training spaces. When shipping consumables, consolidate orders to reduce freight costs and plan around extreme weather closures.
Building a bilingual, accessible training experience
Community programs often serve English and French speakers in the same room. Select AED trainers with bilingual prompts, and keep laminated pocket cards in both languages. If you build slide decks, run them with mirrored text or subtitles so learners catch key terms.
Accessibility goes past language. Provide large‑print cue cards for step sequences, contrast‑rich visuals for pad placement, and consider working with interpreters for Deaf participants. For learners with limited upper‑body strength, encourage team compressions and demonstrate effective body mechanics with stacked shoulders over hands. For wheelchair users who want to practice, place the manikin on a surface at the right height and adjust techniques to preserve good angles.
Cleaning, infection control, and the new normal
Even before respiratory viruses made headlines, good hygiene made training safer and more pleasant. Modern manikins with replaceable faces and lungs make turnover quicker. Assign each learner a barrier device for ventilations, whether pocket masks or disposable shields, and make it clear that compression‑only CPR remains an acceptable option for lay responders. Many groups choose to teach both, then let learners practice what they are comfortable with.
Between classes, disinfect high‑touch surfaces with products approved for the materials in your kit. Bleach solutions can damage plastics and fade surfaces, so check manufacturer guidance. Use alcohol‑based wipes for quick turnarounds, then a deeper clean monthly. Air out manikins to prevent odours, and store them fully dry to avoid mildew. The simplest habit is often the most effective: gloving and hand hygiene before and after each station.
Storing and moving the kit without wearing it out
Most damage occurs during transport. A hard case with custom foam inserts protects manikin faces and valves. Colour‑coded pouches, one per station, cut setup time and reduce lost items. If your program travels frequently, invest in a rolling case with large wheels that can handle snow, gravel, and curbs.
Storage temperature matters. AED trainers and manikins tolerate a wide range, but adhesives and rubber components degrade faster in heat and crack in deep cold. Treat your kit like you would delicate electronics. Keep it indoors when not in use, and if you must store it in a vehicle overnight during winter, bring sensitive components inside.
Label everything. Equipment assigned to volunteers tends to wander. A durable label with your organization’s name and a phone number brings stray items home more often than you would expect.
Budgeting, grants, and total cost of ownership
Sticker price is the start, not the finish. A mid‑range community kit with three manikins, an AED trainer, and first aid training props can run from $1,800 to $4,000 depending on feedback features and brand. Add consumables: lungs, wipes, gloves, barriers, and replacement pads. Over two years, consumables and small parts often equal 20 to 40 percent of the initial purchase. Build that into your grant applications.
Look for local funding. Municipal community safety grants, service clubs, and corporate community investment programs often sponsor training. Emphasize the number of people you will train per year, the events you support, and any partnerships with schools or seniors’ centres. If you can demonstrate reach into high‑risk settings like rinks, marinas, or remote hamlets, your case strengthens.
Avoid false economy. Skipping feedback manikins to save a few hundred dollars usually costs more in retraining time and reduced learner confidence. By contrast, you can trim costs by sharing an AED trainer across partner organizations and by standardizing on one manikin brand to consolidate spare parts.
A simple procurement and rollout plan that works
When community groups procrastinate on purchasing, it is rarely reluctance. It is the friction of choices, budgets, and schedules. Boil it down and make steady progress with this short plan.
- Define your training goals for the next 12 months: number of sessions, expected learners, and typical venues
- Choose a supplier that has stock in Canada, can ship within your timeline, and provides after‑sales support with spare parts
- Buy a starter kit that includes three adult manikins with at least two feedback units, one child, one infant, and an AED trainer with bilingual prompts
- Build a consumables plan and order extras: lungs, pads for the AED trainer, gloves, barriers, and disinfectant for six months
- Schedule an instructor tune‑up session to standardize scenarios, set a maintenance calendar, and run a pilot class to test the setup
This second list stays focused on what actually removes roadblocks. Once you complete these five steps, momentum takes over.
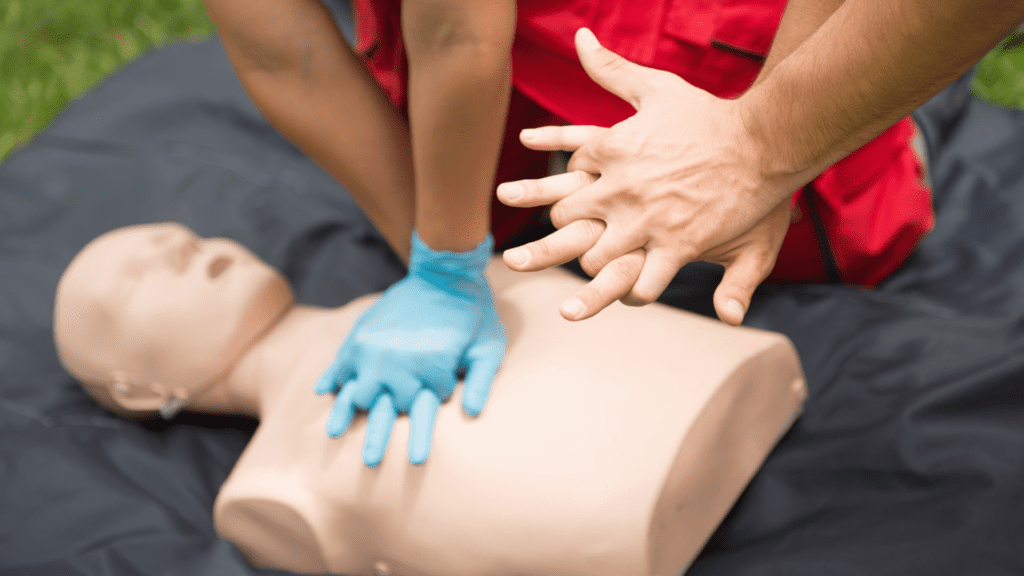
Running sessions that people remember
Gear supports instruction, not the other way around. Keep practice cycles short and frequent. Start with a two‑minute CPR burst on feedback manikins so learners feel the work. Coach for full recoil, a common error even among experienced volunteers. Rotate to AED practice quickly, then back to compressions with the device in place. People learn the rhythm of teamwork when they see that compressions continue while pads go on.
Blend scenarios. A realistic event at a rink might include a slip, suspected head injury, and unresponsiveness. Build a path from scene safety to spinal motion restriction principles, then CPR, then AED. For parents and caregivers, use infant choking relief drills with a full cycle: back blows, chest thrusts, reassessment, and activation of emergency medical services. In Canada, many learners default to 911, but in remote areas remind them of local dispatch numbers and satellite communication limits.
Do not skip debriefs. Ask what felt awkward, what went smoothly, and what they would do differently next time. Capture these notes to refine the next session. Small adjustments, like placing barrier devices on lanyards at each station, often come from learner feedback.
Maintenance that protects your investment
Create a simple schedule. After each session, do a quick clean, count consumables, and note any damage. Monthly, perform a deeper inspection: check valves for wear, verify AED trainer batteries, and test all feedback indicators. Quarterly, inventory spare parts and reorder before you run out.
Track with a one‑page log per device. Write the serial number, purchase date, last service, and any issues. When something feels off during class - a light not registering depth, a sticky valve - annotate the log right away. Future you will thank present you.
For AED trainers, keep the firmware updated if the model supports it. Some offer improved prompts or new training scenarios over time. When in doubt, reach out to the Canadian distributor for guidance instead of improvising fixes that void warranties.
Legal and standards context without the jargon
Canada’s Good Samaritan principles protect people who act in good faith to help during emergencies. Teach volunteers to identify themselves, get consent when the person is responsive, and act within their level of training. Emphasize that using an AED is safe when following prompts, and that devices will not deliver a shock unless indicated.
While community programs are not workplaces, many borrow from workplace standards. CSA and provincial regulations guide equipment in occupational settings. Borrow best practices: keep training materials up to date with the latest guidelines from recognized bodies, maintain hygiene, and document your sessions. For groups that also run programs in workplaces, align content with the certification body relevant to that province or territory.
Adapting to special populations and activities
Senior centres benefit from extra time on safe body mechanics. Heavy compressions fatigue quickly. Teach switching rescuers every two minutes and demonstrate how to use a stool or bench to protect knees.
Youth sports need bleeding control practice as much as CPR. A realistic tourniquet drill and internal pressure techniques change how young coaches react on the sideline. For aquatic programs, include drown‑related scenarios. Teach the sequence of ensuring scene safety, removing the person from the water when safe, starting rescue breaths, then compressions, and drying the chest quickly for AED pad adhesion.
Community kitchens, festivals, and cultural gatherings often involve knives, hot liquids, and crowds. Include burn first aid that emphasizes cool running water for at least 10 minutes, not ice, and cover with a clean dressing. Avoid creams and ointments during training unless you are teaching specific burn protocols.
Where to look for reliable suppliers and support
Canada has several reputable vendors that specialize in emergency training equipment Canada wide, from national distributors to regional suppliers that know provincial nuances. When evaluating, prioritize responsiveness, parts availability, and transparent warranties over the absolute lowest price. Ask for references from community groups similar to yours. Many will share candid feedback on what lasted and what disappointed.
If your area has a robust volunteer firefighter association or search and rescue group, consult them. They often have hard‑earned opinions on manikin brands, AED trainer reliability, and maintenance tricks. Partnerships can also open doors to shared spaces or shared gear for larger events.
When your kit is ready, make it visible
Training works best when it becomes normal. Store the kit in a place where volunteers see it. Run a 10‑minute micro‑drill before monthly meetings. Invite community partners to join a session. Put a simple poster on the community noticeboard listing where the kit lives, who to contact for training, and how to request coverage for an event.
After a real incident, debrief with care. Document what went well, where the kit helped, and what you will change. Replace used consumables immediately. Recognize volunteers who stepped forward. In my experience, these moments knit a community together, and word of mouth brings the next wave of learners through your doors.
The bottom line for community groups
You do not need the most expensive gear to create confident responders. You need a reliable core: durable CPR training manikins Canada suppliers can service, an AED training unit with clear bilingual prompts, a first aid training pack that lets people touch and try, and an instructor plan that respects real‑world constraints. Add a maintenance habit, a clear procurement path, and training sessions that feel real instead of theoretical.
Community groups multiply safety. A thoughtfully built kit makes that multiplier strong and predictable. When the next festival, game, or potluck fills the hall, you will know that readiness is packed, labelled, and ready to teach.
CPR Depot Canada — Business Info (NAP)
Name: CPR Depot CanadaAddress: 340 Croft Dr, Tecumseh, ON N8N 2L9
Phone: +1-877-570-7322
Website: https://cpr-depot.ca/
Email: [email protected]
Hours:
Monday: 9:00 AM – 6:00 PM
Tuesday: 9:00 AM – 6:00 PM
Wednesday: 9:00 AM – 6:00 PM
Thursday: 9:00 AM – 6:00 PM
Friday: 9:00 AM – 6:00 PM
Saturday: Closed
Sunday: Closed
Open-location code (Plus Code): 8537+C8 Tecumseh, Ontario
Map/listing URL: https://www.google.com/maps/place/CPR+Depot/@42.3036,-82.8392601,17z/data=!3m1!4b1!4m6!3m5!1s0x883b2aedd5f271a1:0xfee6f8b7ab8f4110!8m2!3d42.3036!4d-82.8366852!16s%2Fg%2F1q6cff15h
Embed iframe:
Socials:
https://www.facebook.com/people/CPR-Depot-Inc/61575911496200/ https://www.instagram.com/cprdepotinc/ https://www.youtube.com/@CPRDepot
https://cpr-depot.ca/
CPR Depot Canada is a supplier of medical training products and related supplies serving customers across Canada.
The business is listed at 340 Croft Dr, Tecumseh, ON N8N 2L9.
To contact CPR Depot Canada, email [email protected] or call +1-877-570-7322.
Hours listed are Monday–Friday 9:00 AM–6:00 PM, with Saturday and Sunday closed.
For directions and listing details, use: https://www.google.com/maps/place/CPR+Depot/@42.3036,-82.8392601,17z/data=!3m1!4b1!4m6!3m5!1s0x883b2aedd5f271a1:0xfee6f8b7ab8f4110!8m2!3d42.3036!4d-82.8366852!16s%2Fg%2F1q6cff15h
Popular Questions About CPR Depot Canada
Where is CPR Depot Canada located?CPR Depot Canada is listed at 340 Croft Dr, Tecumseh, ON N8N 2L9.
What are the hours for CPR Depot Canada?
Hours listed: Monday–Friday 9:00 AM–6:00 PM; Saturday and Sunday closed.
What does CPR Depot Canada sell or provide?
CPR Depot Canada supplies medical and first aid training products and related equipment (product availability varies).
Do they ship across Canada?
The business markets to Canadian customers and operates as a Canada-wide supplier; confirm shipping options at checkout or by contacting [email protected].
How can I contact CPR Depot Canada?
Phone: +1-877-570-7322
Email: [email protected]
Website: https://cpr-depot.ca/
Map: https://www.google.com/maps/place/CPR+Depot/@42.3036,-82.8392601,17z/data=!3m1!4b1!4m6!3m5!1s0x883b2aedd5f271a1:0xfee6f8b7ab8f4110!8m2!3d42.3036!4d-82.8366852!16s%2Fg%2F1q6cff15h
Landmarks Near Tecumseh, ON
1) Tecumseh Town Hall2) Lacasse Park
3) Lakewood Park
4) WFCU Centre (Windsor)
5) Devonshire Mall (Windsor)