Building a Mobile Classroom: Portable CPR and First Aid Training Kits in Canada
A well packed mobile kit turns a single instructor with a hatchback into a travelling lifeline for communities. I have taught in curling rinks in February, in a mine lunchroom two hours up a logging road, and in a daycare where nap mats doubled as patient beds. The right equipment makes those days smooth. The wrong choices, especially with cold batteries or cracked manikin lungs, grind a class to a halt. Building a mobile classroom is not a shopping spree, it is a system. It needs to stand up to Canadian weather, airline baggage limits, and the realities of back to back courses.
This guide looks at the pieces that matter, how they play together, and the trade offs I have learned to make. Whether you assemble your own set or choose one of the CPR instructor packages Canada distributors offer, the goal is the same, portable gear that supports good teaching and reliable practice.
What portable really means
Portability is not just weight. It is how fast you can get from your trunk to ready to teach, and back again, without missing pieces. Most instructors underestimate volume. Four adult torsos plus an infant and child manikin, a bag of lungs and valves, AED training equipment, first aid props, and cleaning supplies will fill a midsize vehicle. On foot, up three flights without an elevator, you will bless a rolling case.
Durability counts more than showroom polish. Canadian winters test plastics. Leave a manikin with inflatable lungs in a trunk at minus 20 and you risk brittle valves. Summer heat is no kinder. Adhesive pads for AED trainers can fail in hot vehicles and on sweaty chests. Build your kit for temperature swings, snow, salt on floors, and long gravel roads.
Finally, portable means self contained. Assume no one will hand you an extension cord, spare batteries, or a roll of tape. Assume the AED mounted on the wall is a brand your trainees have never seen. If you arrive with everything you need in your own cases, you stay on schedule and on message.
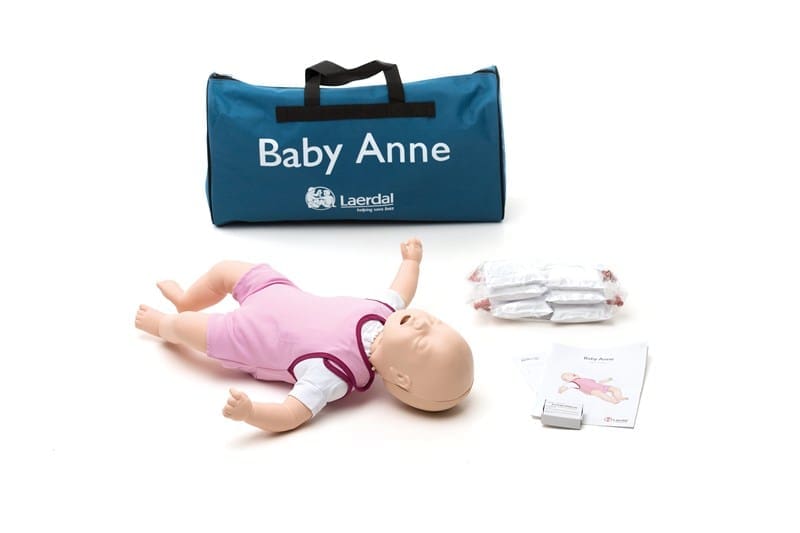
The backbone, CPR training manikins Canada
Manikins are the classrooms where skills take root. The range stretches from simple torsos that accept disposable lung bags to feedback models that display compression depth and rate. For a mobile kit, I look at five points.
First, feedback. Most national curriculums now ask instructors to use objective feedback at least part of the time. That can be a clicker mechanism, a light on the shoulder, or a Bluetooth app with rate and depth graphs. High tech models impress, but they draw power, need updates, and can suffer in cold. I carry two feedback enabled adults for measurement and coaching, then two simpler adults for practice and testing. That balance keeps cost and weight in check while still offering quantifiable guidance.
Second, size mix. Adults teach the core skill. Infants and children complete the picture, especially for childcare, community, and workplace courses. A common set for a class of eight is four adult torsos, one child, and one infant, with students pairing up. For larger classes or classes heavy on infant CPR, bump the infant count to two and accept that you will carry an extra case.
Third, hygiene. Disposable lungs and valves reduce cross contamination, but they fill a bin quickly. Single use face shields cost less and travel lighter. Some manikins accept both. Whichever you choose, keep a clear system for separating new from used. During outbreaks or flu season, I add nitrile gloves and extra disinfectant and forego rescue breaths on shared manikins if policy allows.
Fourth, maintenance. Springs wear, chests loosen, and lungs tear. Build a schedule. Every 25 to 50 uses, plan to replace springs and check chest recoil. Treat tiny screws and O rings as consumables. I carry a quart size bag with spare valves, elastic straps, a small screwdriver, and silicone lubricant. Ten minutes after class can save a morning later.
Fifth, packability. Many CPR training manikins Canada distributors now sell nested torsos and soft rolling bags. I have retired cases with hard edges that chew through car seat fabric and door trim. If you teach in winter, line the bottom of your manikin case with a cheap foam sleeping pad cut to fit. It insulates against the trunk floor and reduces condensation.
Expect to spend a few hundred dollars per basic torso and more for feedback models. An instructor level set of six to eight manikins often lives in the two to five thousand dollar range depending on options and mixing brands. Think in terms of cost per student over the life of the gear. The cheapest torso that discourages realistic compressions will cost you more in poor performance and class time.
AED training equipment Canada, features that matter
Training AEDs build comfort with a device that still intimidates many first time rescuers. In Canada, real AEDs are regulated by Health Canada as medical devices. Training AEDs, by design, are not used on patients. They do not require the same licensing, but you still want reliable, well supported models from established suppliers.
For mobile teaching, three features rise to the top. Reusable training pads with replaceable adhesive layers reduce waste and cost. Most are rated for a set number of stick-and-peel cycles, often a few dozen, before they lose grip. In humid gyms or on lotion covered arms, they fail faster. Keep a second set in a sealed bag and replace on the fly.
Bilingual voice prompts and screen text help across provinces. If you teach in Quebec or serve federal workplaces, the ability to switch between English and French without swapping devices matters. Many trainers mirror the prompts of popular field AEDs so trainees hear the same cadence they would meet in a real emergency.
Remote control and scenario variety are not gimmicks. A small remote lets you trigger shockable or non shockable rhythms, pad placement errors, and motion artifacts from the back of the room. The class sees you stay out of the way and the scenario feels natural. Battery life is the one weakness of many trainers. Use rechargeable AA or lithium options where available, and pack a compact charger with Canadian prongs. A set of fresh batteries can disappear in a single day if you run back to back courses on long voice prompts.
Pad size and child mode also deserve attention. If your courses include pediatric AED use, make sure your trainer supports it, either with a child switch or child pads. And teach placement options for small chests, anterior and posterior. I carry a small roll of low residue tape to show pad rerouting on infants without relying on adhesive that might damage infant manikin skin.
First aid props that travel well
CPR is half your load. The other half, first aid, sprawls if you let it. I keep it lean and modular. A sealed pouch for bleeding control includes cloth and elastic bandages, a pressure dressing trainer, a windlass tourniquet designated for training only, and a small bottle of fake blood for realism. The fake blood lives in a double bag because it stains everything it touches.
For musculoskeletal injuries, foam or aluminum foam splints cut to forearm and ankle length teach shaping and padding without sharp edges. A triangular bandage becomes a sling or a cravat. Add a few yards of cling wrap for holding pads in place on demo limbs and for improvisation teaching. Real metal shears get more respect from students than plastic.
Medical devices should always be training versions. That includes epinephrine auto injector trainers, inhaler spacers with demo cartridges, and glucose meters with blank strips if your curriculum covers them. Do not use expired real medications for practice. The risk of error is not worth it.
I carry two CPR pocket masks with one-way valves for demonstrations of barrier devices. Then I rely on face shields or compression-only teaching for student practice per course guidelines. A small Bluetooth speaker helps with metronome pacing at 100 to 120 beats per minute. It also doubles for playing ambient noise during scenarios so students learn to project their voices and manage a chaotic room.
Buying bundles, CPR instructor packages Canada
There is value in the curated sets many suppliers sell. CPR instructor packages Canada often assemble a class size set of adult and infant manikins, an AED trainer, spare lungs or face shields, a pump for inflatables if needed, a cleaning spray, and a carry bag. Packages tend to save some money compared to piecemeal buying, and they spare you the friction of sourcing compatible parts.
The trade off is flexibility. If you know you want a higher proportion of infants, or you prefer a specific feedback standard, a package might force compromises. Watch for what I call filler, low value extras tossed in to justify a higher price, such as flimsy mats or cheap timers you will never use. Better packages spell out counts, model numbers, and warranty details. With currency swings and regional shipping costs in Canada, confirm the final landed price, not just the list price.
I often start with a mid level package for speed, then upgrade single components over time. For example, I have swapped in a more robust AED trainer that matches a client’s installed devices when I teach solely for that company. I have added a child manikin to a kit that came only with adults. Packages are a starting point, not a locked system.
Cases, wheels, and the art of getting in the door
Your cases shape your day more than any single gadget. Soft rolling duffels soak up odd shapes and ride well in cars. Hard polymer cases with gaskets protect electronics and stand up to rain and slush, useful if you park a block from a community center and have to cross three snow banks. Pack heavy at the bottom and think in modules. One case for manikins, one for AED trainers and electronics, one for first aid props, one thin portfolio for paperwork and certificates.
Air travel adds rules. Most major Canadian airlines allow checked bags at 23 kilograms on standard fares. A full manikin case can creep over that limit. Split loads to avoid overweight fees. Lithium batteries have carry on restrictions. Keep lithium battery packs and some AED trainer batteries in your cabin bag. Print a sheet with battery specs in case security asks. A small luggage scale in your trunk saves a lot of guesswork.
Label cases on four sides. Add your phone number and a list of the major contents. If a case goes missing in a hotel ballroom or gets left in a client boardroom, a staff member has the information they need to reach you before you drive an hour down the highway.
Hygiene that holds up to real schedules
Between classes, you will have two hours to eat, repack, sanitize, and drive. A workable cleaning protocol is gold. Use a surface disinfectant compatible with your manikin plastic. Many quaternary ammonium sprays work well and leave less residue than bleach, but check the manufacturer’s guidance. Wipe chests and faces, then allow full contact time. In cold rooms, the contact time stretches because evaporation slows. Build that into your plan or you risk sticky residue and a smell that bothers the afternoon group.
Face shields should be single use. Collect them in a marked waste bag as students rotate. Disposable lungs are best changed daily, or more often if damaged. If policy allows, replace every 25 to 50 student uses. Gloves, hand sanitizer, and tissues belong at a side table where students can grab them without breaking the flow. During higher respiratory illness seasons, I shift more practice toward compression-only and mask demonstration instead of full mouth-to-mouth practice.
Power, batteries, and backups
Mobile classrooms often run on AA, AAA, and the goodwill of wall outlets. Keep a compact organizer with labelled compartments for spare batteries. Rechargeables save money over time, but they require discipline. Rotate sets. Charge the night before. Pack one sealed set of primary alkaline batteries in case your charger dies in a motel with questionable wiring. For AED trainers that accept both, choose models with user replaceable cells not proprietary packs.
Carry a CSA approved power bar with surge protection and a 7.5 meter extension cord. Old community halls love to hide the only usable outlet behind a stage piano. Tape down cords with gaffer tape if you cross foot traffic. A small headlamp belongs in your top pocket for digging in cases in dark corners or during a sudden power outage. I also keep a spare HDMI cable and an HDMI to USB C adapter for those times a client wants you to use their TV for a quick video and no one can find the right cable.
Teaching through Canadian weather
Cold and heat shape equipment decisions. In winter, never leave manikins with inflatable lungs or AED trainers with LCD screens in a trunk overnight. Plastics and seals fail in the cold, and condensation forms when you bring them into a warm room. Store gear indoors between classes. If you must bring cold equipment into a classroom, open the cases and let gear acclimate for 30 minutes before you power anything up.
In summer, vented vehicles still heat fast. Adhesive pads degrade. Keep trainers and pad sets inside or use insulated soft coolers without ice to slow heat gain. I have placed pad sets under tables on cool basement floors during a July course to keep them tacky.
Salt and slush are enemies. In January, carry an old towel or two to protect floors and give students a dry kneeling spot. Wipe manikin backs before storing. A handful of silica gel packs tucked into cases helps pull moisture between classes.
Space and client coordination
A mobile classroom needs surprisingly little, but that little matters. Ask for a firm floor area big enough for pairs to kneel around three or four manikins with some elbow room. Carpet is easier on knees than polished gym floors. I travel with a few foldable pads to cover hard surfaces. Confirm access to a sink or at least a washroom for hand hygiene. Ask about parking and building access, especially outside regular hours when doors might be locked.
Load in takes 10 to 20 minutes, load out similar. Build that time into your bookings. Leave the room cleaner than you found it. Clients remember that and invite you back. Document attendance and certification details on a roster that never leaves your side. Privacy expectations in Canada are clear, keep personal data secured in transit and in storage.
Insurance is not equipment, but it belongs in this conversation. Carry professional liability insurance appropriate to your scope, and verify that your policy covers mobile teaching, not just a fixed training site. Some clients will ask for proof. Have a current certificate ready in your portfolio.
Curriculums and compliance without the jargon
In Canada, major https://dallasyvtt240.lowescouponn.com/aed-training-equipment-canada-simulation-tools-that-improve-response-times training organizations such as the Canadian Red Cross and Heart and Stroke Foundation align to international resuscitation guidelines and publish their own course structures. Provincial and territorial workplace regulators recognize certain providers for workplace first aid. In Ontario, that means WSIB approved providers. In British Columbia, WorkSafeBC has its own standards. Your mobile kit must match the curriculum you deliver.
That alignment shows up in small ways. Compression feedback requirements. Ratios of adult to infant practice time. The need to include AED practice in every CPR module. If you teach a blended course with online theory and in person skills, your mobile classroom becomes the entire practical component. Overbuild for that. You will run more stations in parallel and you will need spare consumables.
Certification cards are moving to digital formats with QR codes and e rosters. A mobile printer is rarely worth the trouble, but a tablet or phone with reliable data allows you to verify access and correct names on the spot. Keep a paper backup roster in case a basement classroom with cinderblock walls eats your signal.
Sourcing, shipping, and bilingual realities
Buying emergency training equipment Canada wide is easier than it used to be. Most major distributors stock CPR and first aid training kits, manikins, and AED trainers in Canadian warehouses. That matters when a part fails mid season and you need replacements in days, not weeks. If you import from the United States or overseas, factor in brokerage fees, duties, and delays. A spare set of valves that costs twenty dollars can become fifty after shipping and taxes.
Language is practical, not political. If you work in Quebec or serve federal organizations, bilingual materials are expected. That means student manuals, wall posters, AED trainer prompts, and even labels on your cases. Choose equipment and print materials with that in mind. Some AED training equipment Canada distributors offer bilingual pad overlays and prompt sets as standard.
Warranty and support deserve a question or two up front. Ask how long common consumables will be available. Ask about service centers in Canada. I have retired otherwise good AED trainers because pads and remotes went out of production.
A realistic maintenance rhythm
Gear that travels breaks. Plan for it and it becomes a non issue. Fix problems early and you avoid show stoppers in front of a class.
Here is a simple cadence that has served me well:
- After each class, wipe down surfaces, bag used disposables, and note any sticky pads or damaged parts on a small card that lives with the case. Replace obvious failures before you drive off.
- Weekly, even in light teaching periods, power up AED trainers, test remotes, and spin through scenarios for 5 minutes. Top up batteries and check chargers.
- Monthly, inventory consumables. Count face shields, lungs or valves, wipes, gloves, and adhesive pads. Reorder when you hit a floor you set for yourself, not when you hit zero.
- Quarterly, perform deeper checks on manikin springs, chest plates, and head tilt mechanisms. Replace parts that are near failure, not just broken.
- Annually, review your kit against current curriculum updates. Retire or supplement pieces that no longer meet feedback or content expectations.
That list is deliberately short. Long maintenance lists gather dust. Short ones get done.
Cost, not just price
Budgets decide what gets on the truck. A serviceable mobile classroom for eight students usually lands in a mid four figure budget in Canadian dollars. The lower end of that range buys basic torsos without digital feedback and a single AED trainer. The higher end buys two feedback adults, additional child or infant models, and a second AED trainer with bilingual prompts and a remote.
Consumables add a per student cost that many new instructors forget to calculate. Face shields and wipes can add a dollar or two per person. Disposable lungs increase that. Replaceable adhesive layers for AED training pads cost a few dollars per class depending on use. Batteries, cleaning sprays, and gaffer tape are quiet expenses that pile up across a season.
Where to splurge and where to save is part judgment, part audience. For corporate clients who have AEDs onsite, match your AED training equipment to their brand or feature set. For remote communities where resupply is slow, favor gear with field replaceable parts and long lasting consumables. If you teach many infant focused classes, add extra infant manikins and save on one fewer adult torso. If your classes are small and frequent across multiple sites, lighter equipment and compact cases outrank top tier features.
A lean load out you can rely on
Before I leave for a course, I run one compact sequence. It is the difference between confidence and a sinking feeling when a student asks for something you forgot.
- Count manikins by size while placing them in the vehicle, and confirm lungs or masks for each are in the same case.
- Test AED trainers on battery power, check pad stickiness with a single peel, and toss a spare set of pads into the electronics case.
- Verify the first aid pouch has tourniquet, pressure dressing trainer, splints, and device trainers, then add the fake blood bottle if the venue allows it.
- Check battery organizer, chargers, power bar, extension cord, and speaker, then add the headlamp.
- Place roster, pens, sanitizer, gloves, and certificates or digital device for issuing them into the top layer of the last case you load so it is the first item you see at setup.
This short ritual takes five minutes and has saved my day more times than I can count.
The mobile classroom, built for Canadian realities
A portable setup is more than a bag of gear. It is a commitment to meet students where they are, in the places they already gather, with tools that work the same in a school gym in Halifax and a workshop in Fort McMurray. Good CPR training manikins motivate strong, correct compressions. Reliable AED training equipment Canada suppliers stand behind helps students trust the devices they will find on their walls. Smartly chosen CPR instructor packages Canada can jump start your build, then smart upgrades refine it. A thoughtful selection of emergency training equipment Canada wide, from pressure dressings to epinephrine trainers, fills out the picture without weighing you down.
No two instructors pack the same kit, and that is fine. The best kits reflect the courses you teach, the distances you travel, and the people you serve. Build for speed, for reliability, and for the weather out your window. Replace the items that let you down. Keep the pieces that earn their spot. With a planned mobile classroom, you can focus on the moment that matters, a student finding good rhythm on a chest for the first time, and the quiet confidence that follows them back to their workplace, team, or family.
CPR Depot Canada — Business Info (NAP)
Name: CPR Depot CanadaAddress: 340 Croft Dr, Tecumseh, ON N8N 2L9
Phone: +1-877-570-7322
Website: https://cpr-depot.ca/
Email: [email protected]
Hours:
Monday: 9:00 AM – 6:00 PM
Tuesday: 9:00 AM – 6:00 PM
Wednesday: 9:00 AM – 6:00 PM
Thursday: 9:00 AM – 6:00 PM
Friday: 9:00 AM – 6:00 PM
Saturday: Closed
Sunday: Closed
Open-location code (Plus Code): 8537+C8 Tecumseh, Ontario
Map/listing URL: https://www.google.com/maps/place/CPR+Depot/@42.3036,-82.8392601,17z/data=!3m1!4b1!4m6!3m5!1s0x883b2aedd5f271a1:0xfee6f8b7ab8f4110!8m2!3d42.3036!4d-82.8366852!16s%2Fg%2F1q6cff15h
Embed iframe:
Socials:
https://www.facebook.com/people/CPR-Depot-Inc/61575911496200/ https://www.instagram.com/cprdepotinc/ https://www.youtube.com/@CPRDepot
https://cpr-depot.ca/
CPR Depot Canada is a supplier of medical training products and related supplies serving customers across Canada.
The business is listed at 340 Croft Dr, Tecumseh, ON N8N 2L9.
To contact CPR Depot Canada, email [email protected] or call +1-877-570-7322.
Hours listed are Monday–Friday 9:00 AM–6:00 PM, with Saturday and Sunday closed.
For directions and listing details, use: https://www.google.com/maps/place/CPR+Depot/@42.3036,-82.8392601,17z/data=!3m1!4b1!4m6!3m5!1s0x883b2aedd5f271a1:0xfee6f8b7ab8f4110!8m2!3d42.3036!4d-82.8366852!16s%2Fg%2F1q6cff15h
Popular Questions About CPR Depot Canada
Where is CPR Depot Canada located?CPR Depot Canada is listed at 340 Croft Dr, Tecumseh, ON N8N 2L9.
What are the hours for CPR Depot Canada?
Hours listed: Monday–Friday 9:00 AM–6:00 PM; Saturday and Sunday closed.
What does CPR Depot Canada sell or provide?
CPR Depot Canada supplies medical and first aid training products and related equipment (product availability varies).
Do they ship across Canada?
The business markets to Canadian customers and operates as a Canada-wide supplier; confirm shipping options at checkout or by contacting [email protected].
How can I contact CPR Depot Canada?
Phone: +1-877-570-7322
Email: [email protected]
Website: https://cpr-depot.ca/
Map: https://www.google.com/maps/place/CPR+Depot/@42.3036,-82.8392601,17z/data=!3m1!4b1!4m6!3m5!1s0x883b2aedd5f271a1:0xfee6f8b7ab8f4110!8m2!3d42.3036!4d-82.8366852!16s%2Fg%2F1q6cff15h
Landmarks Near Tecumseh, ON
1) Tecumseh Town Hall2) Lacasse Park
3) Lakewood Park
4) WFCU Centre (Windsor)
5) Devonshire Mall (Windsor)